How to transfer cryptocurrency from one wallet to another
Transferring cryptocurrency is one of the most common actions investors take, and also one of the easiest ways to lose funds if done incorrectly. Unlike traditional banking, crypto transactions are irreversible. Once funds leave your wallet, there is no undo button.
This guide breaks the process down step by step, with context at each stage, so you understand why each step matters, not just what to do.
If you haven’t yet decided which crypto wallet is right for you, check out our educational resource on “Which crypto wallet is right for you”.
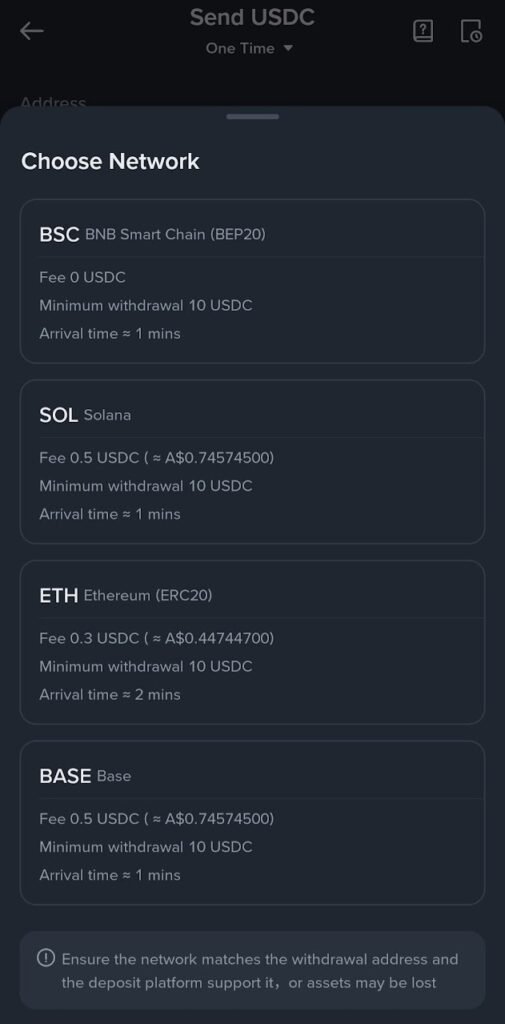
Step 1: Confirm the Asset and Network
Before you even think about addresses or amounts, you need to confirm exactly what you are sending and on which network.
Many cryptocurrencies exist on multiple blockchains. For example, USDT can live on Ethereum, Tron, or other networks. Sending the right asset on the wrong network is one of the most common reasons funds are lost.
Take a moment to:
- Check which network your sending wallet is using.
- Confirm the receiving wallet supports that same network.
- Ensure both wallets are aligned before moving forward.
If there is any uncertainty at this stage, stop and verify. This single step prevents more losses than anything else.
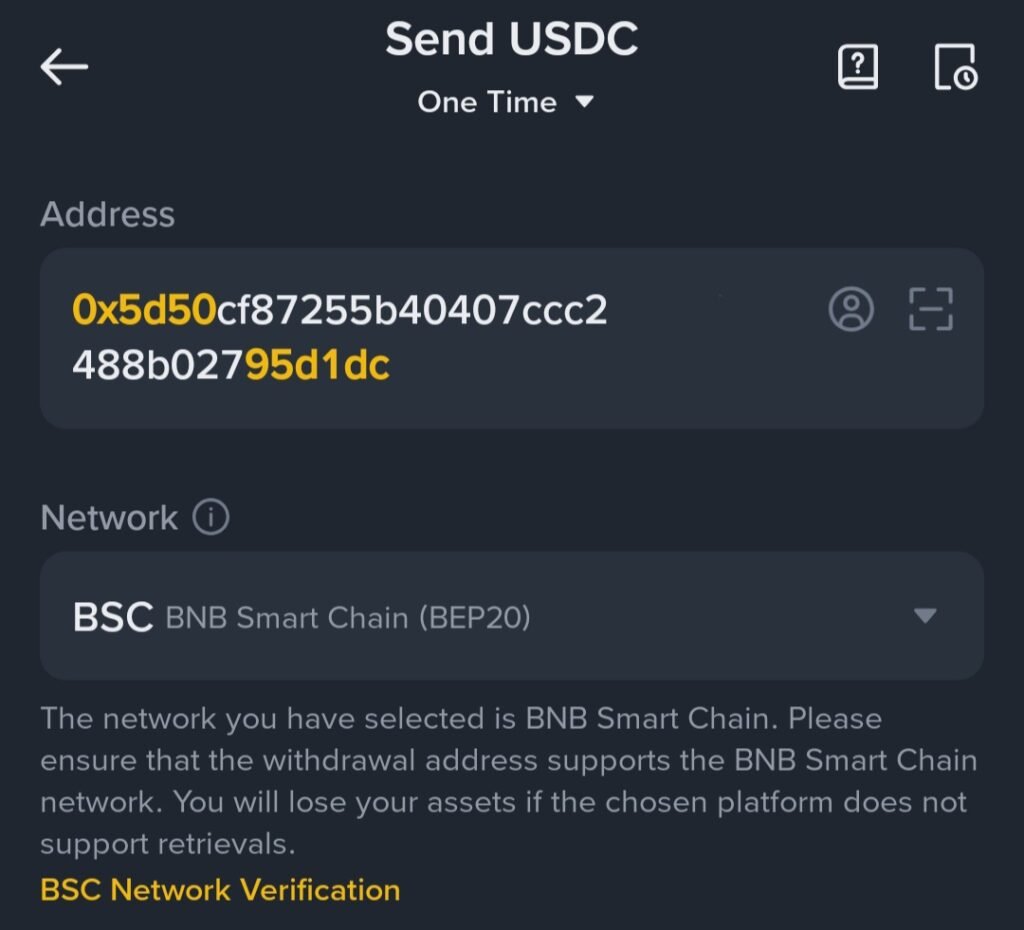
Step 2: Generate and Copy the Receiving Address
The receiving address is the destination for your funds. It must be exact.
Always generate the address directly from the receiving wallet. To practice safe transactions, Avoid:
- Manually typing addresses
- Using screenshots sent by others
- Copying addresses from unofficial sources
If you are using a hardware wallet, confirm the address on the physical device screen. This protects you from malware that can alter addresses on your computer or phone without you noticing.
A good habit is to check the first and last few characters of the address after pasting it.
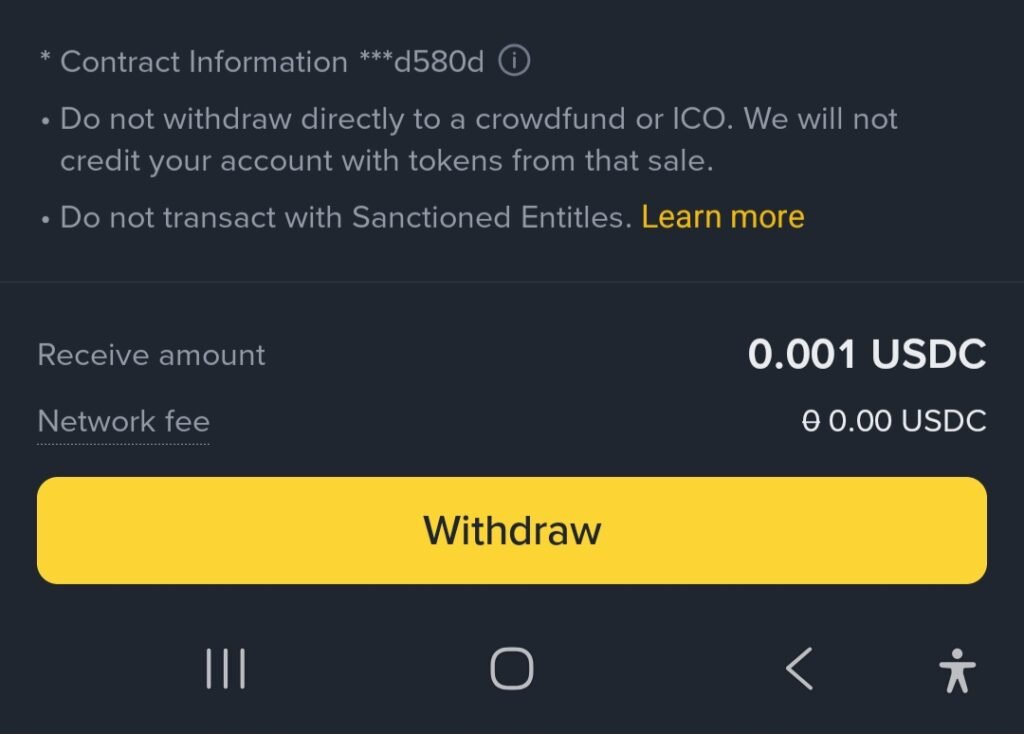
Step 3: Send a Test Transaction First
Do NOT treat this step as optional, it could potentially save you from losing thousands!
Before transferring a large amount, send a small test transaction. This confirms:
- The address is correct.
- The network is correct.
- The receiving wallet can access the funds.
Depending on which network you’re using to send funds, transaction costs will exist. Most networks have a fee so small that you probably wouldn’t even notice, but be prepared if you’re using the Ethereum network to pay a few extra dollars to front-run the transaction. Looking at the big picture, a few extra dollars in fees is insignificant compared to the cost of losing the full amount.
Once the test transaction arrives successfully, you can proceed with confidence.
Bonus: As an added security step, consider adding two factor authentication to your wallet. Activating this single step substantially reduces the potential for your funds to be stolen. Access our “Two Factor Authentication” educational resource for a full guide on how to protect your funds.
Step 4: Review the Transaction Details Carefully
Before confirming the transaction, slow down and review everything.
Take a final look at:
- The receiving address
- The asset and network
- The amount being sent
- The transaction fee
You’ll notice by now that you’ve checked, re-checked, and checked again all of your transaction details. This is because rushing these steps have claimed millions in lost funds over the years.
Crypto rewards patience and punishes speed. If something feels off, cancel and start again. There is no penalty for being cautious.
Step 5: Understand and Set the Transaction Fee
As we touched on in step 3, every blockchain charges a fee for processing transactions. This fee determines how quickly your transfer is confirmed. We refer to this fee as ‘Gas’.
Senders have the ability to choose to pay a slightly higher gas fee than the base fee if they wish for the transaction to be front-run (faster processing & completion). On the flip side, senders can also elect to pay a slightly lower gas fee, however this can leave a transaction stuck for hours or even days in processing limbo. For the most part, senders shouldn’t stray away from the standard transaction fee choice.
Step 6: Confirm and Broadcast the Transaction
Once you confirm the transaction, the funds are then sent to the blockchain network for processing. You have now successfully completed all the steps for sending crypto funds on-chain.
At this point:
- The transaction cannot be reversed.
- The funds are temporarily “in transit”.
- You will receive a transaction ID or hash.
It’s very important that you do not attempt to resend the transaction unless you are absolutely sure it failed. Whilst most transactions are completed & visible by the recipient within a 10 second to 2 minute window, some transactions can lag behind in transit. If this is the case with your transaction, the next step will explain how you can track the progress of your transaction.
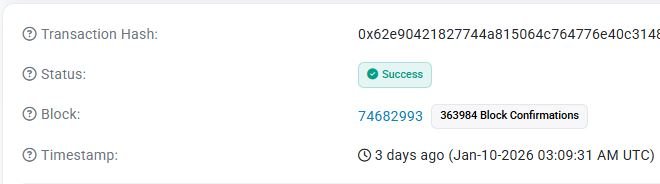
Step 7: Track the Transaction on the Blockchain
Use the transaction ID to monitor progress on a blockchain explorer such as:
- Etherscan
- Blockchain.com
- Solscan
- Tronscan
Tracking the transaction helps you understand:
- Whether it has been confirmed.
- How many confirmations it has.
- When the funds are fully settled.
Until the transaction is confirmed, patience is key. Do not begin to stress until a 24 hour period has elapsed. If after 24 hours the funds haven’t been successfully received by the other party, it’s at this point that you can then look at yourself in the mirror in disappointment that a step wasn’t carefully followed.
Common Mistakes to Avoid
- Sending on the wrong network.
- Skipping test transactions.
- Trusting auto filled or shared addresses
- Rushing large transfers
- Assuming wallets can recover errors.
Most losses come from skipping steps, not from lack of knowledge. For a full breakdown of common mistakes to avoid when sending/receiving crypto, check out our “How to manage Crypto trading risks” educational resource.
Extra Safety Tips
- Perform transfers in a calm environment.
- Avoid public WiFi when sending funds.
- Keep your devices updated.
- Never share private keys or recovery phrases.
- Treat every transfer as final.
Safe crypto transfers are about following processes, not assuming confidence.
The most experienced investors still follow these steps every time. They do not rely on memory or speed, they rely on discipline.
Mastering safe transfers gives you confidence, control, and peace of mind. It is a foundational skill every crypto investor should learn early.