WALLET & SECURITY

Choosing the Right Hardware Wallet: A Complete Investor Guide
When it comes to securing cryptocurrency, hardware wallets are the gold standard for investors. They provide a cold storage option for investors, meaning your private keys never touch the internet; protecting your assets from hacks, malware, and phishing attempts.
But not all hardware wallets are created equal. The two industry leaders, Ledger and Trezor, dominate the market, each offering different philosophies, ecosystems, and security models through their hardware wallets. Beyond them, new market challengers like Coldcard, BitBox, Tangem and SafePal have introduced innovative features designed for specific users.
This guide breaks down each of the major hardware wallets, explaining how they work, how they differ, and which one might best suit your setup.
What Is a Hardware Wallet?
A hardware wallet is a physical device that securely stores your crypto private keys offline.
When you send or sign a transaction:
- The transaction is created on your computer or phone.
- It’s sent to the hardware wallet for offline signature.
- The wallet signs the transaction internally (without exposing the private key).
- The signed transaction is sent back to the blockchain network.
Your keys never leave the device, meaning even if your computer is compromised, your funds stay secure.
Hardware wallets are most commonly used by long-term holders, traders, and institutions who prioritize self-custody and security.
For a full breakdown of what Cold (Hardware) wallet is, check out our “Which Cryptocurrency wallet is right for you” lesson.
It’s time for a complete break-down of each available hardware wallet. Feel free to select your desired wallet choice, otherwise take the time to read through each wallet to find out which may be right for you.
To skip straight to your desired wallet choice, click the button below for direct access.
Ledger Wallet
What is Ledger: Company Background & Evolution
When it comes to safely storing crypto, Ledger is one of the most recognised names in the space. Founded in 2014, Ledger built its reputation around one goal; helping people take full ownership of their digital assets through secure hardware wallets.
At its core, Ledger is a cold storage device. That means it keeps your private keys offline, away from the internet and potential hacks. The device itself acts as your personal vault, where transactions must be approved physically by you before anything moves on-chain.
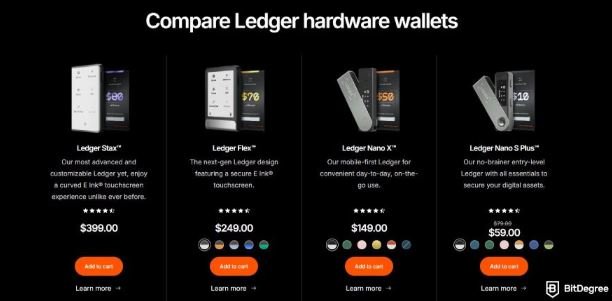
Ledger’s product line has expanded from their initial Nano wallets into Nano X, Nano S Plus, and now into their newer models like Ledger Stax and the Ledger Flex. From an enterprise side, Ledger also offers institutional products (Ledger Vault, Ledger Enterprise) beyond consumer hardware.
‘Ledger Live’ is the ecosystem’s software hub. The companion App allows you to view your portfolio, send & receive assets, install apps for each token, and even stake certain cryptocurrencies directly, all while your private keys never leave the device.
Beyond being a wallet, Ledger’s ecosystem also integrates security layers, educational content, and institutional-grade solutions for businesses. Their Secure Element chips (the same kind used in passports and credit cards) add another level of protection against physical tampering or malware.
Ledger’s strength lies in control and independence. You’re no longer trusting an exchange to hold your funds. Instead, you’re holding them yourself. For everyday investors, that’s the difference between having crypto and owning it.
Hardware Models & Features
Ledger offers several hardware wallet models, each targeted at slightly different use-cases.
Models
- Ledger Nano S Plus – The budget/entry model; USB-C, compact, supports many assets.
- Ledger Nano X – Premium model: Bluetooth mobile connectivity, larger app capacity (more coins/tokens), rechargeable battery in some cases.
- Ledger Stax – More recent, design-forward model with touchscreen/E-Ink display, and an emphasis on usability and premium features
- Ledger Flex – Another newer model, focusing on modularity or advanced features. (And our personal favourite).
Feature Highlights
- Secure Element Chip (tamper-resistant hardware) for storing private keys.
- Companion appLedger Live to install apps for individual cryptocurrencies, send/receive, stake tokens, etc
- Multi-asset support: Big list of coins, tokens, networks.
- Mobile + Desktop compatibility (especially with Nano X)
- Recovery via seed phrase: When you set up a Ledger device, you generate a 24-word (or sometimes 12/24) seed phrase which allows you to recover funds if the device is lost.
Security Model: What Makes Ledger Secure
Ledger’s entire ecosystem is built on the idea of security through isolation; keeping your private keys completely separated from online environments where most hacks occur.
- Secure Element (SE) Chip: Every Ledger device is powered by a Secure Element chip, the same type of chip used in passports, credit cards, and banking systems. This chip is designed to protect against both digital and physical attacks, meaning even if your computer is compromised, your private keys remain safe inside the device.
- Secure OS + Attestation: Ledger’s firmware and operating system, known as BOLOS (Blockchain Open Ledger Operating System), creates a secure execution environment where each crypto app runs independently. This sandboxed approach means a vulnerability in one coin’s app cannot compromise the rest of your wallet.
- PIN protection / device control: Ledger devices undergo third-party security audits and follow strict manufacturing processes that prevent tampering before the product reaches you. Combined with Ledger’s PIN protection, passphrase support, and recovery seed system, the result is a multi-layered security model that’s trusted by both retail users and institutions.
- Seed phrase backup: Your recovery phrase is the ultimate fall-back, so Ledger emphasises safe storage of that. Specifically, it’s recommended to keep a paper copy of your seed phrase stored somewhere safe; away from water or fire damage.
- Firmware updates: The company issues regular security patches, updates to firmware and Ledger Live. Users are urged to update to stay safe.
What this means: If you use the device correctly (buy from trusted source, initialise it yourself, keep recovery phrase safe, update firmware), your private keys are highly protected from most internet-based attacks.
Pros & Strengths of Ledger
Based on expert reviews and features, major strengths of Ledger include:
✅ Industry-Leading Security
Ledger uses Secure Element chips and its proprietary BOLOS operating system to isolate and protect private keys. This multi-layer security model is trusted by both retail users and institutions worldwide.
✅ Offline Protection (Cold Storage)
Private keys never touch the internet. All signing happens within the device, keeping funds safe even if your computer or phone is compromised.
✅ User Ownership and Control
Ledger gives you complete custody of your crypto. You approve every transaction physically, meaning no one — not even Ledger — can move your assets without your confirmation.
✅ Wide Asset Support
Ledger supports over 5,500 cryptocurrencies and tokens through the Ledger Live app, with continuous updates for new blockchains and protocols.
✅ Integration with Ledger Live Ecosystem
Ledger Live makes it easy to view your portfolio, stake assets, and manage transactions — all without compromising security.
✅ Portability and Durability
Compact, travel-safe devices built with robust materials. You can store or move significant value with something smaller than a USB drive.
✅ Reputation and Transparency
Ledger has nearly a decade of proven reliability and transparent security audits, making it one of the most trusted brands in crypto hardware wallets.
Cons & Limitations of Ledger
❌ Not Fully Open Source
While Ledger’s apps and interfaces are open-source, its firmware and Secure Element code are closed. This limits full community verification of its security processes.
❌ Requires Technical Understanding
Ledger is beginner-friendly overall, but initial setup still requires careful attention to recovery phrases, app installations, and firmware updates. Mistakes during setup can cause access issues later.
❌ Centralised Recovery Concerns
Ledger’s optional “Recover” feature raised privacy debates, as it involves encrypted key backups with third-party custodians. While optional, it created concern among users who prefer full decentralization.
❌ Physical Risk Still Exists
The device itself can be lost, stolen, or damaged. Without a correctly stored recovery phrase, assets on the wallet are permanently unrecoverable.
❌ Limited Mobile Usability (Nano S Plus)
The Nano S Plus lacks Bluetooth and requires a cable connection. Only the Ledger Nano X supports mobile pairing, which might be more convenient for on-the-go users.
❌ Price Point vs. Simpler Alternatives
Ledger offers premium-grade security, but it’s more expensive than basic software wallets. For casual holders, the cost may feel high relative to simpler storage options.
How to Setup & Use your Ledger
Here’s a typical setup flow for using a Ledger hardware wallet:
- Purchase from official source – ensure sealed, new device.
- Connect to computer or mobile, download official Ledger Live from ledger.com.
- Initialise device – choose “Set up as new device”.
- Create PIN on the device.
- Write down your recovery seed phrase (24 words recommended) on the provided cards (or your metal backup) and store securely offline.
- Install apps for each cryptocurrency you want to hold via Ledger Live (e.g., Bitcoin, Ethereum, etc.).
- Send funds to your Ledger address – you receive a public address via device+app, verify on device screen, then send from exchange/hot wallet to your Ledger address.
- Regularly update firmware and software – ensure device and Ledger Live are updated; check for authenticity signs.
- For mobile use (Nano X, Stax) – pair with Bluetooth if required, but many experts recommend USB connection for maximum security.
- Safely store recovery phrase and safely move long-term holdings.
Remember: Your funds are only truly secure if your seed phrase is safe and private, and you verified device authenticity.
Trezor Wallet
What is Trezor: Company Background & Evolution
Trezor hardware wallets are another form of physical devices designed to store your crypto private keys offline (cold storage). They work by requiring physical confirmation on the device for transactions, meaning even if your computer is compromised, your keys aren’t exposed.
Founded in 2013 by SatoshiLabs (based in Prague, Czech Republic), Trezor launched with the world’s first consumer-hardware cryptocurrency wallet. The company emphasises open-source software and transparency in hardware wallet design as the core highlight.
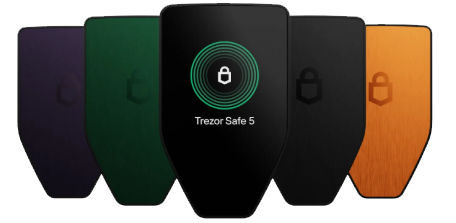
Over the years Trezor has released multiple models (Model One, Model T, Safe 3, Safe 5) and expanded its ecosystem with the companion app Trezor Suite and integrations with third-party wallets. Their mission: give users full control of their digital assets, using hardware wallets that keep private keys offline.
Key components:
- The device itself: stores your seed, private keys offline.
- Companion software: Trezor Suite (for desktop; mobile support limited) to manage your portfolio, send/receive assets, view history
- Recovery / backup mechanism: Seed phrase and optional advanced backups (Shamir Backup, multi-share backup).
- Broad coin/token support: thousands of asset
Hardware Models & Features
Trezor offers multiple hardware models. Here is a breakdown:
Models
- Trezor Model One: Entry level. USB (micro-USB or USB-C depending region), basic display, supports many coins but less premium features.
- Trezor Model T: Flagship model with full-colour touchscreen, USB-C, advanced features (Shamir backup, microSD slot on some versions).
- Trezor Safe 3: A newer model with Secure Element (EAL6+) certification, open-source design, monochrome screen, USB-C.
- Trezor Safe 5: Even more premium model (higher asset support, touchscreen)
Feature Highlights
- Private keys never leave the device; transactions must be confirmed on the device.
- Open-source firmware and hardware design (for most models) allowing independent audits.
- Passphrase support (adds an extra word beyond seed phrase, enabling hidden wallet feature)
- Broad multi-currency support: Some models support 9,000+ coins/tokens.
- Recovery via standard seeds (12/24 words) and advanced backup (multi-share or Shamir on higher models).
Security Model: What Makes Ledger Secure
Trezor’s approach to security is built on transparency, simplicity, and open-source architecture. Unlike some competitors, every part of Trezor’s firmware and hardware design is fully auditable by the public, ensuring there are no hidden components or undisclosed code.
At its core, Trezor follows the same security principle as other cold wallets; your private keys never leave the device. Transactions are signed inside the wallet itself, so even if your connected computer is compromised, your crypto remains secure.
Trezor devices use a deterministic wallet structure (BIP32/BIP39/BIP44 standards), which means all your crypto accounts are generated from a single recovery seed phrase. This seed never touches the internet and can be backed up offline for complete recovery if the device is lost.
One key difference is Trezor’s focus on open-source firmware, allowing the global security community to verify and improve its code. This makes it highly transparent but also relies heavily on its physical protection measures, since unlike Ledger, Trezor does not use a “Secure Element” chip. Instead, it relies on its PIN protection, passphrase encryption, and physical confirmation process to secure transactions.
Each device runs on Trezor Core, its proprietary operating system that isolates wallet operations from external connections. When confirming a transaction, details must be manually verified on the Trezor’s screen before approval, ensuring you always see exactly what’s being signed.
To protect against physical theft, Trezor also includes anti-brute-force protections, wiping the device after too many incorrect PIN attempts. Optional Shamir Backup (a feature on the Model T) allows splitting your recovery seed into multiple shares, stored separately for added redundancy.
Pros & Strengths of Trezor
✅ Fully Open-Source Security Architecture
Trezor’s firmware, software, and hardware design are all open-source. This transparency allows independent security experts to review, verify, and improve its code; a major advantage for users who value decentralisation and trust through visibility.
✅ True Cold Storage (Offline at All Times)
Private keys never leave the device. All transactions are signed within Trezor itself, ensuring your crypto remains safe even if the computer or network it’s connected to is compromised.
✅ Simple and Intuitive Setup
Trezor’s interface and companion software (Trezor Suite) make setup straightforward. Users can manage multiple cryptocurrencies, view balances, and send or receive funds without technical knowledge.
✅ Industry-Standard Recovery System
Uses BIP39 recovery seed phrases, meaning you can restore your wallet on any compatible device if your Trezor is lost or damaged. The optional Shamir Backup (Model T) adds extra redundancy and resilience.
✅ PIN and Passphrase Protection
Trezor adds multiple layers of protection before access. A wrong PIN entry increases delay times exponentially, and adding a passphrase creates a hidden wallet for extra privacy and security.
✅ Transparent and Audited Development
Because its entire codebase is public, Trezor is continuously audited by security researchers and the community. This open model reduces hidden risks and ensures constant improvement.
✅ Long-Term Track Record and Reputation
As the world’s first hardware wallet (launched in 2014 by SatoshiLabs), Trezor has built a decade-long reputation for reliability and user trust in both retail and institutional settings.
Cons & Limitations of Trezor
❌ No Secure Element Chip
Unlike Ledger, Trezor doesn’t use a Secure Element — a dedicated chip found in high-security hardware like passports and payment cards. While its open-source model offers transparency, it also relies more heavily on the user’s physical and procedural security habits.
❌ Vulnerable to Physical Access Attacks
If an attacker gains physical access to your Trezor and has advanced technical tools, there is potential for extracting private keys through hardware-level attacks. This is why storing the device safely and using a passphrase is critical.
❌ Slightly Bulkier Interface Design
Trezor devices are functional and durable, but some users find them less compact and sleek compared to other wallets. It’s not a major flaw, but worth noting for portability and everyday use.
❌ Limited Mobile Compatibility
Trezor currently focuses on desktop software (Trezor Suite) and has limited native mobile app support compared to some competitors. This makes it less convenient for investors who manage portfolios on the go.
❌ Fewer Supported Assets Compared to Ledger
Trezor supports most major cryptocurrencies and tokens, but it lags behind Ledger in total asset count and third-party app integrations. Certain niche coins and DeFi tokens may require manual management through external interfaces.
❌ Price Point (Model T)
The Trezor Model T, while feature-rich with a touchscreen and Shamir Backup, is relatively expensive compared to entry-level hardware wallets.
How to Setup & Use your Trezor
Here’s a typical setup flow for using a Trezor hardware wallet:
- Purchase from the official Trezor Shop or authorised reseller. Avoid used/third-party side-sales.
- Connect the device to your computer (USB-C for newer models).
- Go to the official site and download Trezor Suite (or open the setup wizard).
- Follow setup: install firmware, create PIN, generate recovery seed.
- Write down your recovery seed (12/24 words) on paper or metal backup; never take a photo of your seed phrase.
- Optionally enable passphrase / hidden wallet.
- Install coin apps (via Trezor Suite or external wallet) for the assets you hold.
- To receive crypto: generate receive address on device (verify on hardware screen) then send from exchange/hot wallet.
- To send crypto: approve on device screen.
Update device firmware periodically and keep software (Trezor Suite) up to date.
(Also ensure you keep recovery seed safe, test your backup on a spare device sometimes)
The Ledger & Trezor lead the market as the two preferred hardware wallet choices that most crypto investors go with. But for those of you looking for a hardware wallet that specialises in a specific niche, here are a few strong shouts:
Coldcard Hardware Wallet
What is Coldcard: Company Background & Evolution
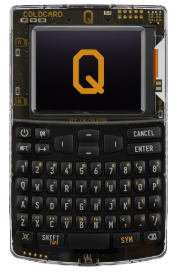
The Coldcard Mk4 is a hardware wallet designed exclusively for Bitcoin by Canadian based company, Coinkite. It emphasises maximum security and self-custody through features like dual Secure Element chips, air-gapped workflows (via microSD/NFC), and a physical keypad. A Coldcard keeps private keys offline to protect against malware and computer vulnerabilities and uses a dedicated security chip to store them. It’s known for its strong security features, including its air-gapped design and the ability to verify transactions on its own screen before signing, making it a popular choice for users prioritizing security.
Key Features
Bitcoin-Only Security Architecture
Coldcard is purpose-built for Bitcoin. By limiting its scope to a single asset, it reduces attack surfaces and eliminates vulnerabilities that can arise from managing multiple blockchains. This focused design appeals to serious Bitcoin investors who value long-term, uncompromising security.
True Air-Gapped Operation
Coldcard can be used completely offline, meaning it never needs to connect to a computer or the internet. Transactions are signed using a microSD card, allowing users to transfer data between the wallet and a computer without any direct physical connection. This removes nearly all remote hacking vectors.
Secure Element & Dual-Chip Design
Unlike some open-source wallets that avoid hardware encryption, Coldcard integrates a Secure Element chip alongside a Microcontroller Unit (MCU). The Secure Element safely stores private keys, while the MCU handles the device’s interface and user interactions. These two chips communicate through controlled pathways, limiting potential exploitation.
Open-Source Firmware & Verifiable Builds
While it uses a Secure Element, Coldcard’s firmware and wallet logic are fully open-source, allowing the crypto community to audit the code for transparency. Users can verify firmware hashes before installation to ensure authenticity and integrity.
Advanced PIN Protection and Brick-Me Feature
Coldcard uses an innovative anti-phishing PIN system, requiring two PIN entries; one to unlock the wallet, and another to confirm it’s genuine. It also features a Brick-Me PIN, which allows users to permanently wipe the device if they’re ever coerced or feel compromised.
Multi-Sig and Compatibility with Major Wallets
Coldcard integrates seamlessly with popular Bitcoin wallet software such as Sparrow, Specter, Electrum, and BlueWallet. It supports multi-signature configurations, making it ideal for advanced investors who use multiple devices or custodial setups for added protection.
No Cloud Dependence or Centralised Software
All security logic runs locally on the device. There’s no need for third-party platforms or accounts, meaning users maintain full sovereignty over their Bitcoin holdings; no company can restrict or recover your wallet.
Tamper-Evident Hardware Design
Coldcard ships in tamper-evident packaging, and the device itself has a transparent case that allows users to visually inspect for hardware modification. Each unit is sealed with a unique bag number and verification checklist to ensure authenticity before first use.
Secure Backup & Recovery Options
Coldcard uses the industry-standard BIP39 seed phrase system and allows encrypted backups via microSD. It also supports advanced options like BIP85 deterministic child seeds, letting users generate new wallets or hot wallets from a single secure root without exposing the original seed.
Developer & Power User Features
Coldcard includes functions such as PSBT (Partially Signed Bitcoin Transactions), script inspection, address verification, and firmware downgrades, giving advanced users complete transparency and control. It’s a wallet built for those who truly want to understand what’s happening under the hood.
Pros & Strengths of Coldcard
✅ Bitcoin-Only Focus = Maximum Security
Coldcard is built exclusively for Bitcoin. By removing the complexity of supporting multiple blockchains, it drastically reduces potential attack surfaces. This makes it one of the most secure wallets available for Bitcoin holders.
✅ True Air-Gapped Operation
You can use Coldcard completely offline, with no USB or Bluetooth connections required. Transactions are signed via microSD card, meaning your private keys never come into contact with an internet-connected device.
✅ Dual-Chip Architecture (with Secure Element)
Coldcard combines a Secure Element chip for private key protection with a separate microcontroller that handles the user interface. This layered approach keeps security-critical functions isolated from potential threats.
✅ Advanced PIN and “Brick-Me” Protection
Its anti-phishing PIN entry system protects against fake devices or phishing attempts. The optional Brick-Me PIN permanently wipes the wallet in emergencies; perfect for users who value absolute control over their security.
✅ Built for Long-Term Storage
Coldcard is a true cold wallet designed for investors who intend to hold Bitcoin for years. It’s durable, offline, and independent; ideal for securing generational wealth outside of exchanges or intermediaries.
Cons & Limitations of Coldcard
❌ Bitcoin-Only Support
One person’s considered strength is another person’s limitation. Coldcard supports Bitcoin exclusively. While this focused design improves security, it means users holding altcoins or stablecoins will need a separate wallet solution for those assets.
❌ Steeper Learning Curve
Coldcard’s advanced security features, like PSBT files, multi-sig configurations, and microSD signing all require more technical understanding than plug-and-play wallets like Ledger or Trezor. It’s best suited for users who are comfortable learning detailed processes.
❌ Less User-Friendly Interface
Its small monochrome screen and basic button navigation get the job done but feel outdated compared to touchscreens and modern app interfaces. Functionality outweighs design here, but it’s not built for ease of use.
❌ No Native Mobile or Web App
Coldcard doesn’t integrate with any mobile applications or cloud-based software. All management happens through compatible desktop wallets like Sparrow or Electrum, which may not suit casual crypto investors.
❌ No Altcoin or DeFi Support
Since Coldcard is purely Bitcoin-focused, users can’t stake, swap, or interact with smart contracts directly from the device. For those invested in broader DeFi ecosystems, this is a major limitation.
❌ Manual Process for Transactions
Because it’s air-gapped, Coldcard requires transferring files via microSD cards for every transaction. This process maximises security but reduces convenience for those who move funds frequently.
❌ Niche Market Appeal
Its design philosophy prioritises maximum security over accessibility. While perfect for long-term Bitcoin holders, it’s overkill for beginners or casual investors looking for simplicity.
How to Setup & Use your Coldcard
1. Verify the device – Check tamper-evident bag number against Coldcard site. Then power on and confirm the firmware version matches the official release.
2. Create a new wallet – Select “Create Wallet”. Then write down the 24-word seed on paper only.
3. Set the Pin – Create the two part anti-phishing PIN
4. Make Backups of wallet in case of theft or damage – Insert microSD, choose “Backup Wallet” to create an encrypted backup file (Optional Step).
5. Pair with a desktop wallet – Install Sparrow or Electrum on your computer. Then export the XPUB from Coldcard to microSD. Finally, import the XPUB into the desktop wallet.
6. Receive your first Bitcoin – Generate a receive address in the desktop wallet. Verify the address on the Coldcard screen before sharing your public address to receive funds.
BitBox Hardware Wallet
What is BitBox: Company Background & Evolution
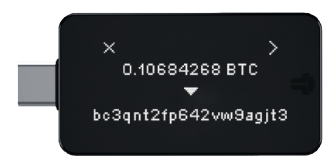
The Bitbox, natively known as BitBox02 is a hardware wallet designed to store your cryptocurrency private keys offline, meaning your keys are never exposed to the internet when making transactions or holding assets. Originating from Switzerland, the Bitbox comes in two main editions: a Multi-asset edition (supports many coins and tokens) and a Bitcoin-only edition (simplified firmware with a reduced attack surface). Manufactured by Shift Crypto AG, Bitbox promotes itself to be known for privacy-focused design and open-source firmware.
Key Features
Two Editions for Different Investors
BitBox02 comes in two models:
- Bitcoin-Only Edition, built for maximum security with minimal code.
- Multi-Edition, supporting Bitcoin, Ethereum, Litecoin, and ERC-20 tokens.
This allows investors to choose between ultra-focused security or broader asset coverage.
Open-Source Firmware and Software
Both the firmware and companion app (BitBoxApp) are fully open-source. This gives the global security community the ability to audit, verify, and improve the code, creating a transparent and trusted security foundation.
Dual-Chip Security Architecture
BitBox02 uses a secure element to store private keys and a separate microcontroller to run the interface and wallet functions. This split design keeps sensitive cryptographic operations isolated from general processes, strengthening defence against both physical and remote threats.
Encrypted microSD Backups
BitBox02 creates an encrypted backup file on a microSD card. This backup method is beginner-friendly and reduces the risk of errors when recording seed phrases, while still allowing full wallet recovery. (Note: We still recommend writing down your seed phrase and private key on paper)
Touch and Swipe Controls
The device uses capacitive touch sensors for navigation; tap, slide, and hold gestures replace traditional buttons. This design is intuitive, minimalistic, and reduces mechanical failure risk.
Large OLED Display for Verification
A basic 128×64 pixel OLED screen displays every transaction detail directly on the device. You can verify addresses, amounts, and confirmations with full clarity before signing.
USB-C Plug-In Design
BitBox02 plugs directly into USB-C ports without cables. The design is compact and durable for everyday use.
Multi-Platform BitBoxApp Ecosystem
The BitBoxApp is available on Windows, macOS, Linux, and Android; giving you complete ability to manage accounts, update firmware, display balances, and handle secure signing while keeping all private keys inside the hardware wallet.
Hidden Wallets and Passphrase Support
Advanced users can enable passphrases to create hidden wallets. This adds another layer of privacy and protection if the device is ever stolen, accessed, or inspected.
Pros & Strengths of BitBox
✅ One of the easiest hardware wallets for beginners
The setup process is smoother than most competitors. The microSD backup option removes the stress of writing 24 words perfectly on day one, making it far less intimidating for new investors.
✅ Extremely transparent and community-trusted
Because every part of BitBox02’s software is open-source, it has earned a reputation for honesty. Security researchers consistently validate the code, which builds long-term trust with everyday users who want clarity over secrecy.
✅ Great balance between security and usability
Unlike some high-security wallets that feel difficult or slow to use, BitBox02 maintains strong security while still feeling simple and intuitive. It hits a rare middle ground that suits both beginners and experienced holders.
✅ Comfortable daily-use experience
The touch gestures, clean interface, and BitBoxApp make it easy to check balances, send transactions, or manage accounts without friction. For people who access their wallet often, the experience feels smooth rather than technical.
✅ The Bitcoin-Only version offers reduced attack surface
Having a specialised model designed for Bitcoin only is a real security benefit. Less code means fewer vulnerabilities. It’s ideal for long-term BTC holders who want maximum protection.
✅ Strong ecosystem support without unnecessary complexity
BitBoxApp integrates directly with portfolio management, updates, and basic security tools without overwhelming the user. Many hardware wallets require extra software — BitBox keeps everything in one place.
Cons & Limitations of BitBox
❌ Limited mobile support
BitBox02 works well on desktop, but mobile support is still restricted. iPhone users in particular will feel limited, which reduces convenience for everyday portfolio management.
❌ Smaller ecosystem compared to Ledger
While BitBox supports major assets, it does not have the same wide coverage, staking integrations, or third party app support that Ledger offers. Some tokens and workflows require extra steps or external tools.
❌ MicroSD backups can cause over confidence
The automatic encrypted backup is convenient, but beginners may forget they still need to store that microSD securely. If the card is lost or damaged without a written seed, recovery becomes harder.
❌ No Bluetooth or cable free mobile connectivity
This improves security, but people who want wireless convenience or mobile friendly usage might see it as a drawback.
❌ Smaller screen compared to competitors
The display is functional but small. Verifying long addresses or detailed transaction data requires a bit more attention than on devices with larger screens.
❌ Far less proven than Ledger or Trezor
BitBox02 is well respected, but it does not have the decade-long track record or global user base that Ledger and Trezor have built. Some investors prefer brands with the longest history in the market.
How to Setup & Use your Coldcard
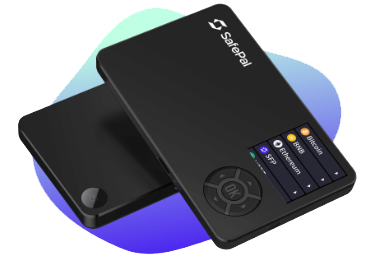
SafePal Hardware Wallet
The SafePal S1 is a hardware wallet designed to offer cold-storage level security at a budget-friendly price. Unlike devices that connect via Bluetooth or USB, the S1 uses an air-gapped architecture (QR code communication, no direct wireless link) to reduce attack surface. Reviews highlight strong security features like a Secure Element chip and broad token support. Based in Singapore, Safepal is backed by a number of credible players in the crypto ecosystem.
Fully Air-Gapped Hardware Wallet Design
SafePal’s S1 wallet is completely offline. That means zero USB connection, zero Bluetooth. zero NFC. All communication happens through QR codes, removing the need for cables or radio connections that could be exploited.
Built-In Security Components
SafePal uses a secure element chip for private key storage, along with self-destruct mechanisms that trigger if physical intrusion is detected. The Safepal device also has a wiping feature if repeated incorrect PIN attempts are made.
QR Code Signing for Transactions
SafePal uses a camera to read unsigned transaction QR codes, signs them internally, and displays a new QR code with the signed transaction. Your keys never leave the device, and data never travels through USB or wireless connections.
Portable and Affordable Hardware Wallet
SafePal S1 is smaller than a credit card and is extremely lightweight. It’s also recognised as one of the most budget-friendly hardware wallets on the market, making secure cold storage accessible to everyday investors. (Keep in mind when it comes to securely holding your finances, cheaper doesn’t always mean better).
Multi-Wallet Support
Users can create and manage multiple wallets within the same device. This is ideal for separating long-term holdings from active investing accounts or organising assets for different strategies.
Secure Firmware with Offline Upgrades
Firmware updates are done via a microSD card, ensuring the device never needs to touch a computer or the internet during the process.
Pros & Strengths of SafePal
✅ Strong hardware security (air gap + Secure Element) at price point.
✅ Great for users wanting multi-chain support without investing in ultra-premium hardware.
✅ Mobile app ecosystem (SafePal app) gives additional features such as asset management, DApp/Swap access
✅ Simplicity and portability — easier for some users to adopt self-custody.
Cons & Limitations of SafePal
❌ Firmware and ecosystem are less “battle-tested” compared to some legacy hardware wallet brands.
❌ Some models nonetheless depend on the mobile app connectivity; the “fully air-gapped” mode requires scanning QR codes which may feel less seamless than plug-and-play USB or Bluetooth for some users.
❌ Closed-source aspects: Some reviewers note that full open-source transparency is lacking.
❌ Battery, screen size, user-interface may be less refined than flagship premium models.
❌ As with all hardware wallets, the main risk remains the user: seed phrase backup, secure purchase, and correct setup.
How to Setup & Use your SafePal
Tangem Hardware Wallet
Tangem is a Swiss fintech company that began its journey in 2017. Headquartered in Zug, Switzerland. Tangem was founded by a small team; including Andrey Kurennykh and Andrew Pantyukhin. Their starting mission was to make crypto self-custody secure, simple, and accessible to everybody.
Early on, Tangem focused on building infrastructure such as smartcard-based hardware and secure chip solutions that could underpin blockchain asset management. Over time, they shifted from B2B supply toward serving retail crypto users directly. This led to the launch of their signature product, the Tangem Wallet, marketed as a card-style hardware wallet, minimalist yet powerful.
What makes Tangem unique is how it blends security and user-friendliness. The Wallet uses a secure embedded chip, evaluated at the high security level EAL6+ ensuring private keys are generated and stored offline, never touching the internet or users’ devices.
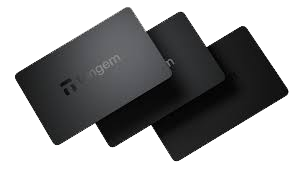
Rather than traditional seed-phrase backup systems, Tangem originally embraced a card-based model: each wallet is delivered as a set of multiple identical cards (usually 2 or 3), each able to access the same funds. If one card is lost, the others still work. This design reflects Tangem’s founder belief: self-custody shouldn’t feel complex or fragile.. it should feel as simple as carrying a card in your wallet.
In 2021 Tangem expanded the Wallet to support multiple cryptocurrencies and blockchains. Instead of limiting users to one or two assets, the “multicurrency” version allowed thousands of tokens and numerous chains, giving users flexibility without sacrificing security.
The company’s growth was supported early on by institutional backing. In 2019, they received a USD $15 million investment from SBI Crypto Investment Ltd. (a subsidiary of major financial services firm SBI Holdings), giving them the runway to scale manufacturing, distribution, and product development globally.
Over the years Tangem has expanded its range beyond just cards. In 2024 they launched the Tangem Ring, a wearable wallet device built with the same secure chip and NFC tech as the card. The Ring aims at making crypto self-custody even more accessible and integrated into everyday life, blurring lines between “wallet” and “gadget.”
Despite expansion and technological innovation, Tangem has maintained a strong security profile. Its firmware and chip architecture have been independently audited (by firms like Kudelski Security and Riscure), and as of recent years the company reports zero incidents of wallet hacking or major security breaches.
Today Tangem operates globally, providing hardware wallet solutions in over 170+ countries. Their goal remains the same as day one: bridging the gap between traditional asset ownership and the digital-asset world, making self-custody secure, simple, and accessible.
Models
- Tangem Wallet – 2 Cards Set: Entry version; buy two cards as a set which give you primary + backup.
- Tangem Wallet – 3 Cards Set: Adds an extra card for redundancy (3 cards means one could be lost and still have two left).
- Tangem Ring: A wearable version, a ceramic ring with an embedded secure chip and NFC antenna, designed for everyday carry. It comes bundled with cards for backup.
Feature Highlights
- Card / ring form-factor: No USB cables, no batteries (for the cards), very minimalist and portable.
- NFC Connectivity: The primary device communicates with your smartphone via NFC tap to sign.
- Secure Element & Certification: Chips meet high security standards (EAL6+), designed to resist invasive and non-invasive attacks, including X-rays, electromagnetic pulses, extreme temperatures.
- Smart backup (card sets): Instead of exclusively using a seed phrase, the backup model involves multiple cards which each hold access capability, reducing some user risk of losing seed phrase
- Ease of use: Tangem emphasizes setup in “under 3 minutes”. Designed to be beginner friendly.
- Wide asset support: Thousands of coins/tokens are supported (via mobile app & integrated services).
- Security certifications & audits: Tangem chips are claimed to be certified at CC EAL6+ (a very high security standard), with independent security audits by firms such as Kudelski Security and Riscure
Tangem’s security model stands on several pillars:
- Private key generation & storage: The private key is generated inside the chip of the card/ring and never leaves it. This means extraction of the key is designed to be impossible without physically breaching the secure element.
- Certified secure element (EAL6+): This is among the highest security standards for chips, equivalent in some respects to those used in passports and payment cards.
- Offline / air-gapped nature: Since the cards don’t need to be connected, charged, or plugged in (for many models), they reduce many attack vectors common to USB connected devices.
- Backup via multiple cards instead of seed alone: The multi-card redundancy means losing one card doesn’t immediately result in total loss (depending on config).
- Independent audits & anti-tamper design: The firmware is audited; the hardware is built to resist tampering and environmental damage.
Important caveat: As with all self-custody solutions, user behavior remains critical. Secure backup of your cards, safe storage, avoiding counterfeit cards, & verifying authenticity still are incredibly important.
Pros & Strengths of Tangem
Here are some of the stand-out advantages based on reviews and features:
✅ Uniquely simple & portable form factor (card or ring).
✅ Extremely durable design – resistant to elements, no battery needed for card version.
✅ Beginner friendly: setup is very quick and intuitive.
✅ Very high security certification (EAL6+), independent audits.
✅ Broad asset support (according to manufacturer).
✅ Smart backup model via multiple cards may reduce seed phrase anxiety.
Cons & Limitations of Tangem
❌ Mobile-only interface (at least traditionally): Because the cards rely on NFC and smartphone app, desktop/USB workflows may be limited compared with some hardware wallets.
❌ Slightly less mature ecosystem compared with legacy brands: Some advanced DeFi integrations, desktop wallet support, multi-sig may be less extensive.
❌ Closed-source hardware/firmware: While the chip and firmware are audited, some users prefer fully open-source models for visibility.
❌ If multiple cards are lost or stolen, backup strategy still matters—the user must treat cards like keys.
❌ If you don’t have an NFC-enabled smartphone or prefer USB workflows, the card model may feel restrictive.
Real-World Use Cases & Fit
Tangem is especially suited for:
- Users who want portability and convenience: The card or ring is easy to carry, tap, sign transactions on the go.
- Beginner self-custody adopters: Simple onboarding, minimal cables or fuss.
- Long-term holders and travel-friendly storage: Durable design, multiple cards for backup means you could distribute backup cards in different locations safely.
- Users who want a low-maintenance cold wallet experience: The card model reduces interaction complexity.
It may be less ideal if you are a heavy DeFi/altcoin trader needing wide desktop integrations, or prefer USB/desktop signing workflows or fully open-source hardware.
How to Setup & Use your Tangem
Best Practices for Hardware Wallet Security
- Always buy directly from the manufacturer, never from third-party sellers.
- Initialise your wallet yourself, never use a pre-set seed.
- Keep your recovery phrase offline, stored securely in multiple places.
- Update firmware regularly from official sources.
- Consider multi-sig setups for large holdings.
- Test small transfers before moving large funds.
Now that you have an understanding of each hardware wallet, it’s time for you to make a decision on which wallet best suits your investing goals. After that, select the next lesson that fits your choice.